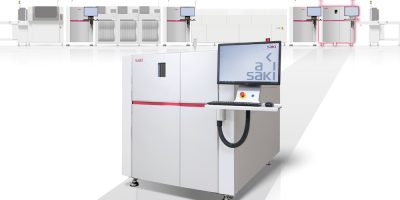
High speed 3D AXI system reduces cycle time; increases accuracy
Automated optical and x-ray inspection equipment manufacturer, Saki, has added a 3D s-ray automated inspection system (3D-AXI) to its 3Xi-M110 range. The 3Xi-M110 V3 delivers a 50 per cent cycle time reduction and the highest accuracy volumetric inspection results on the market today, claimed Saki.
The company has optimised its 3D automated x-ray range in response to the growth in demand for premium PCB and component inspection. The 3Xi-M110 V3 benefits from Saki’s’ Planar CT technology and a suite of tools that are custom developed in-house to optimise the inspection of all types of PCBs. The 3Xi-M110 V3 model delivers cycle times of more than twice as fast compared to earlier models. Saki also claimed the accuracy provided is unparalleled, ensuring cleaner results untarnished by shadows or noise.
Saki’s Planar CT technology detects solder joint defects and microstructure abnormalities in high-density PCBs. The automated x-ray inspection system uses Real 3D volumetric inspection to identify voids in multi-layer solder, through hole assembly and BGA head-in-pillow issues and defective component parts based on fillet position and other factors.
The 3Xi-M110 V3 maintains the same light weight and compact footprint as the 3Xi-M110 while consuming 40 per cent less power per board, to contribute to sustainable manufacturing.
Since its inception in 1994, Saki has led the way in the development of automated recognition through robotic vision technology. Saki’s 3D automated solder paste, optical, and x-ray inspection and measurement systems (SPI, AOI, AXI) have been recognised to provide the stable platform and advanced data capture mechanisms necessary for true M2M communication, improving production, process efficiency, and product quality.
Saki Corporation has headquarters in Tokyo, Japan, with offices, sales, and support centres around the world.


